
A doorknob dent, a moved piece of furniture, a kid's errant elbow — holes in the 2 to 6 inch range are the most common drywall repair homeowners face. They're too big for spackle alone but too small to justify cutting in a new sheet and hunting down a stud. The fix is a self-adhesive mesh patch, and with the right layering of compound, the repair can be invisible under paint.
This method works well for holes up to roughly 6 inches (15 cm) across. Beyond that, or if the damage is near a corner, an electrical box, or spans a stud bay, a rigid backing patch or a proper cut-in repair is more reliable — mesh alone can sag or crack under its own weight over a larger span.
What You'll Need
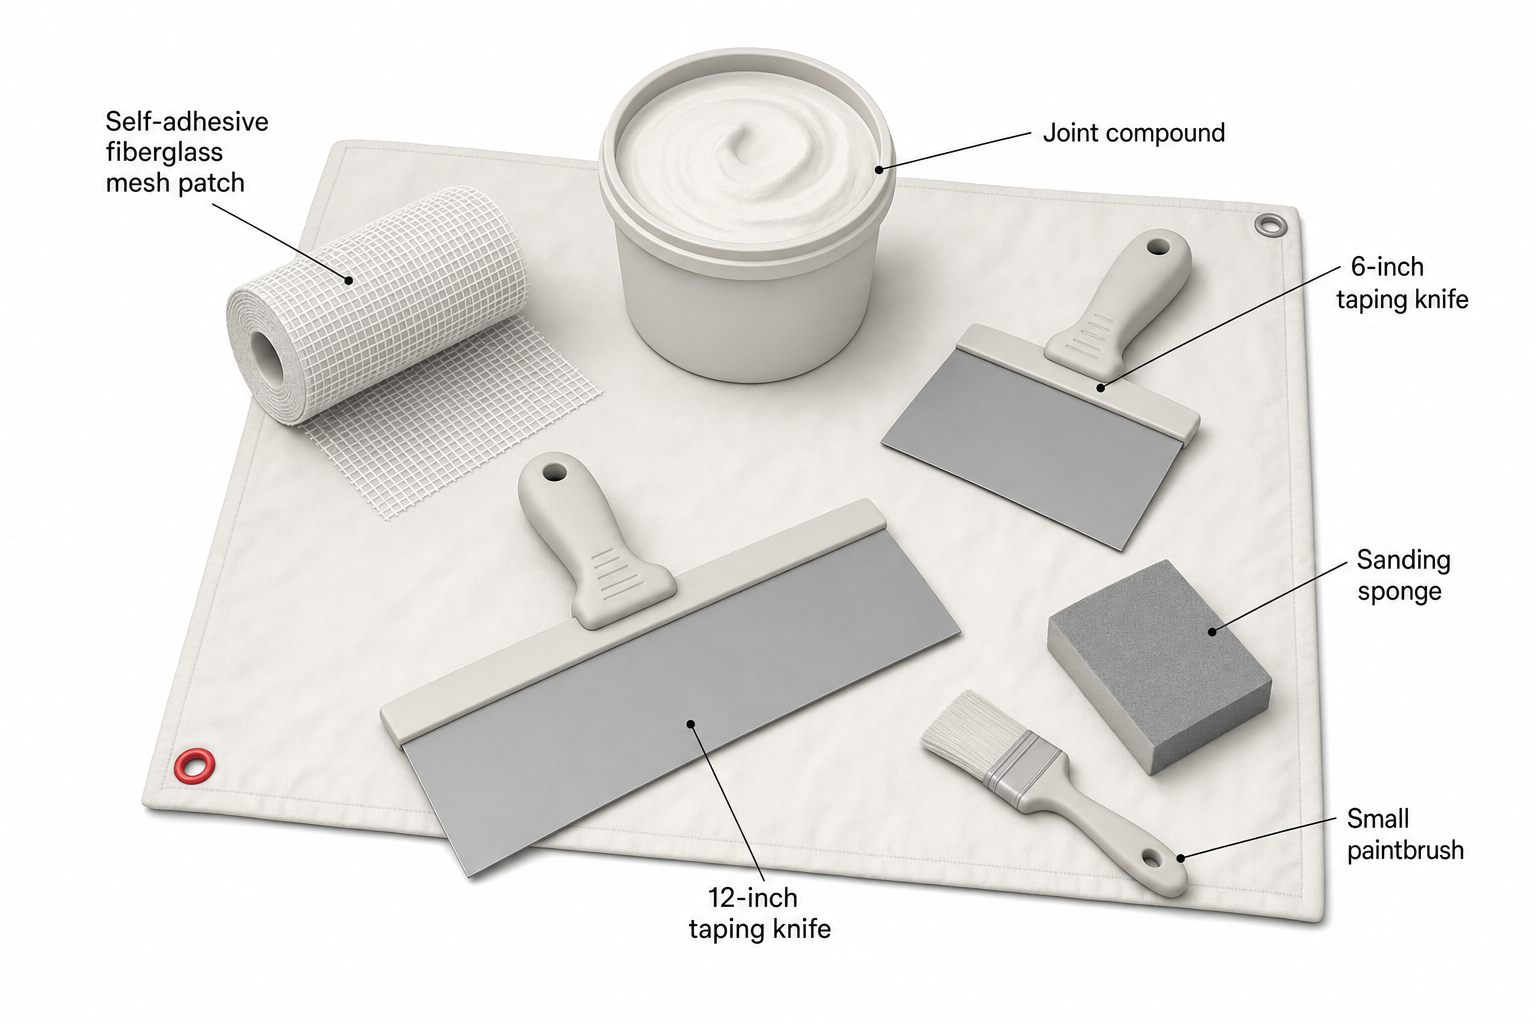
- Self-adhesive fiberglass mesh patch (sized a couple inches larger than the hole on all sides)
- Lightweight joint compound (all-purpose or "topping" compound for final coats)
- A 6-inch and a 10- or 12-inch drywall taping knife
- 150- and 220-grit sanding sponge or pole sander
- A putty knife for scraping loose debris
- Primer and matching paint
- Drop cloth and painter's tape
Step 1: Prep the Hole
Using a utility knife or the corner of your putty knife, knock away any loose or crumbling drywall paper and gypsum around the edges of the hole. You want a clean, stable perimeter — patching over crumbling edges just telegraphs the damage back through later. Vacuum or brush away dust so the mesh patch adheres fully.
If the hole has ragged, torn paper facing sticking up, press it flat or trim it off; raised paper fibers will show as a ridge once compound goes over them.
Step 2: Apply the Self-Adhesive Mesh Patch
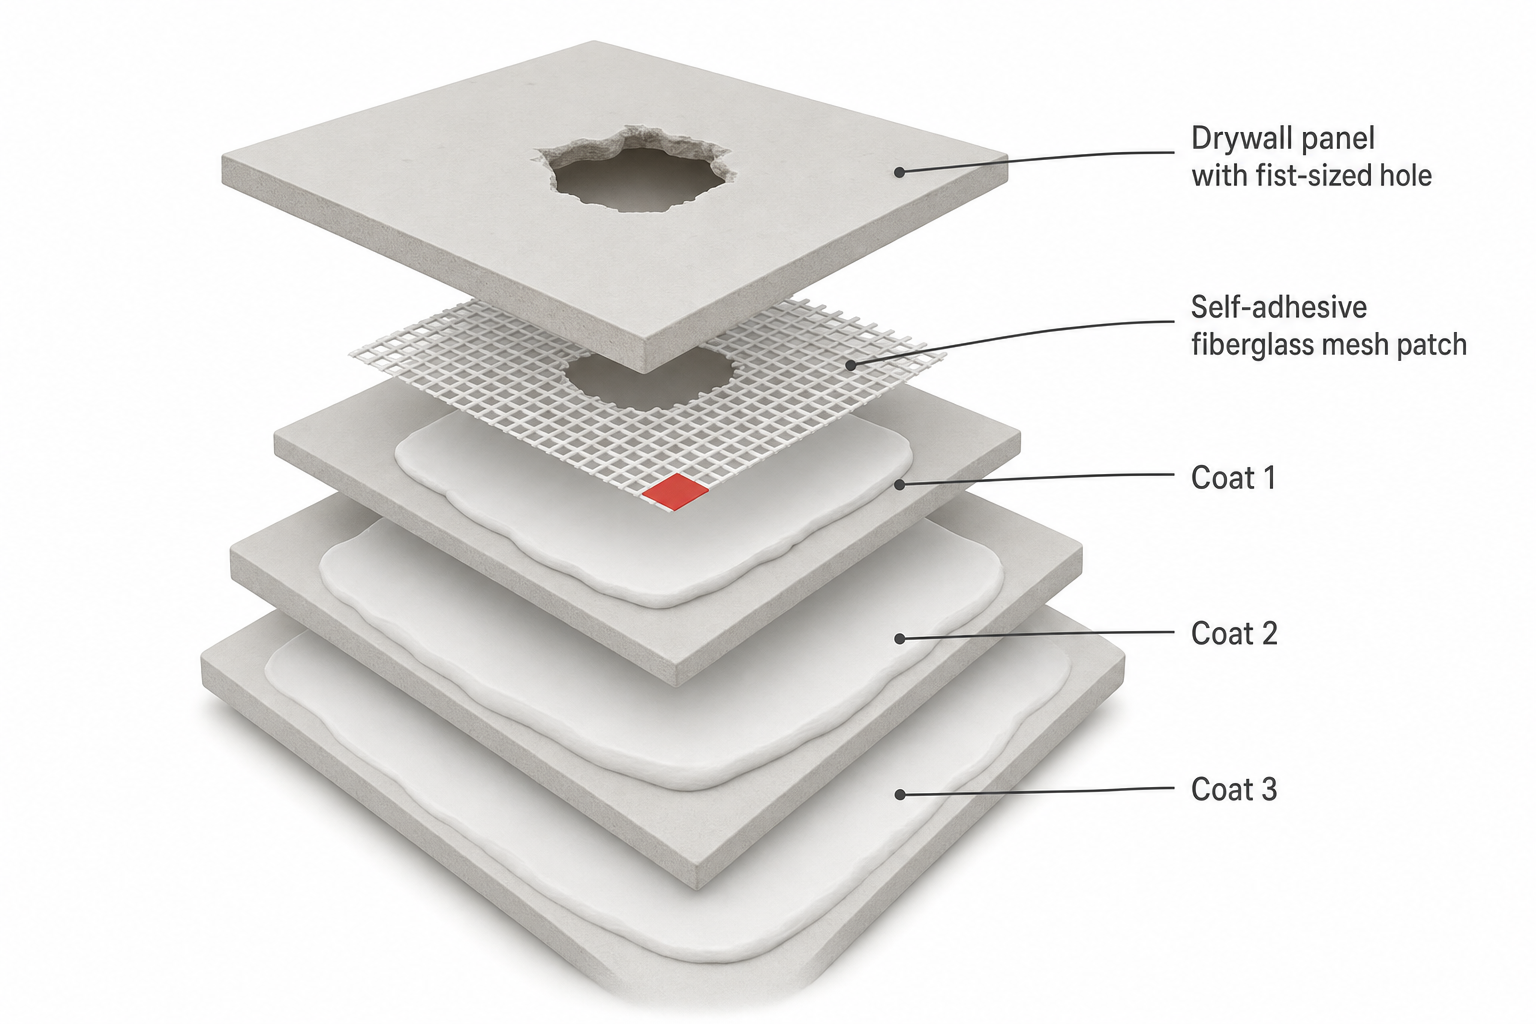
Center the mesh patch over the hole and press it firmly onto the wall, smoothing from the middle outward to avoid air bubbles or wrinkles. The patch should overlap the hole by at least 1.5–2 inches (4–5 cm) on every side — this overlap is what transfers the load of the repair onto solid wall instead of onto the compound alone.
Step 3: First Coat of Compound
Load your 6-inch knife with joint compound and apply a thin, even layer directly over the mesh, feathering the edges out about 2 inches beyond the patch itself. Don't try to fill the whole depth in one pass — the mesh needs the compound to key into it, and a too-thick first coat is prone to cracking as it dries.
Let this coat dry fully. Drying time varies by product and humidity, but as a general rule lightweight all-purpose compound is dry to the touch in a few hours and safe to recoat the next day; humid bathrooms or poorly ventilated rooms will take longer.
Step 4: Second and Third Coats
Switch to your wider knife (10–12 inches) for the second coat — the extra width helps feather the edges thinner and blend them into the surrounding wall so there's no visible ridge. Extend the coat 2–3 inches beyond the previous one each time.
Most patches need two to three coats total to build a flat, invisible surface. Between coats, a quick pass with a sanding sponge on any obvious high spots or ridges (not the whole patch — save the main sanding for the end) keeps things manageable.
Step 5: Sand Smooth
Once the final coat is fully dry, sand with a 150-grit sponge to knock down ridges, then finish with 220-grit for a smooth surface. Run your hand over the patch (with the lights off and a work light held at a low angle across the wall) — this raking light trick reveals bumps and dips that are invisible under normal room lighting.
If you find a low spot after sanding, skim another thin coat over just that area rather than sanding the surrounding wall thinner trying to compensate.
Step 6: Prime and Paint
Joint compound is porous and will soak up paint differently than the surrounding painted surface, leaving a dull, flat-looking patch even after painting — sometimes called "flashing." Always prime the repair first with a standard latex primer, feathering it slightly beyond the compound onto the existing painted wall.
Once primed, paint with the wall's existing color. For the best blend, roll paint over the entire wall section between corners or natural breaks rather than just the patch — spot-painting a small area almost always leaves a visible sheen or shade difference, especially under angled light.
When Mesh Patches Aren't Enough
For holes larger than about 6 inches, or ones near a corner, ceiling line, or electrical box, a mesh patch alone often isn't rigid enough — it can bow inward under light pressure. In those cases, a small rigid backing (a scrap of drywall or a purpose-made patch with a stiff backer, found among the recommendations below) glued or screwed behind the opening gives the compound something solid to bear against.
FAQ
How big a hole can a mesh patch actually fix? Self-adhesive mesh patches work reliably on holes up to roughly 6 inches across. Beyond that, the patch has too much unsupported span and is prone to flexing or cracking; a rigid-backed patch or a full cut-in repair holds up better.
Do I need to sand between every coat of compound? Not thoroughly — a light knock-down of ridges between coats is enough. Save the full 150-to-220-grit sanding for after the final coat is dry, since sanding too early can dig into compound that hasn't cured.
Why does my patch show through the paint even after sanding it smooth? This is almost always "flashing" from unprimed joint compound absorbing paint differently than the surrounding wall. Priming the patch before topcoat paint, and feathering that primer slightly onto the surrounding painted surface, usually solves it.
Can I use spackle instead of joint compound for a mesh patch? Lightweight spackle can work for very small touch-ups, but for a mesh-backed patch spanning a few inches, joint compound is generally easier to feather thin across a wide area and less prone to shrinking or cracking as it dries.
What if the hole is at a corner or near the ceiling? Corners and ceiling lines complicate feathering because there's less flat surrounding wall to blend into, and inside corners often have paper tape that needs matching. These repairs are more forgiving with a rigid backing patch, and if the corner bead itself is damaged, it may be worth consulting a professional.