
If you've ever pulled painter's tape off a wall only to find a fuzzy, feathered line of the wrong color underneath, you already know tape alone doesn't guarantee a clean edge. Paint is thin enough to creep under the tape's edge through tiny gaps in the surface texture — a problem painters call bleed-through. The fix isn't better tape (though quality matters); it's sealing the tape edge itself before you apply the topcoat. This guide walks through the caulk-and-tape method that gets genuinely crisp paint lines without tape bleeding, even on textured walls, wood trim, or old cracked corners.
Why Tape Bleeds in the First Place
Painter's tape relies on firm, continuous contact with the surface to block paint. On a perfectly smooth, clean wall, a good tape can do this on its own. But most walls and trim aren't perfectly smooth — they have texture, old paint ridges, seam lines, or tiny gaps where the tape doesn't fully seat. Paint is a liquid under some pressure from a brush or roller, so it finds those gaps and wicks underneath by capillary action. Humidity, low-quality tape, and pressing tape down too loosely all make this worse.
The professional workaround is to caulk the tape edge with a thin bead of paintable caulk (or with a thin skim of the same wall paint you're about to apply) before you lay down the finish coat. That seals every microscopic gap along the tape line, so bleed-through has nowhere to go.
What You'll Need
- A quality painter's tape (look for one rated for the surface — delicate for wallpaper or fresh paint, standard for trim and walls)
- A paintable, latex-based caulk (siliconized acrylic caulk is a common paintable option; check the label for "paintable")
- A caulking gun with a fine-cut nozzle tip, cut at roughly a 1in angle for a thin bead
- A damp cloth or sponge for wiping excess caulk
- A 2-inch to 2.5-inch angled sash brush and/or a small foam roller
- A putty knife or plastic scraper for surface prep
- Painter's tools below can speed this up — see the recommendations below for tape and caulk options that hold a clean line
Step-by-Step: The Caulk-Sealed Tape Method
1. Clean and dry the surface first
Wipe down the trim or wall edge with a damp cloth to remove dust, grease, and cobwebs. Let it dry completely — tape adheres poorly to damp or dusty surfaces, and that's one of the most common causes of bleed. If the trim has old peeling paint, scrape it back to a sound edge with a putty knife before taping.
2. Apply the tape and burnish it hard
Run the tape along the line you want to protect, keeping it as straight and continuous as possible. Then go back over the entire length and press it down firmly — use the flat edge of a putty knife or an old credit card and run it along the tape with real pressure. This step, called burnishing, flattens the tape into any texture and is arguably more important than the caulk step. Skipping it is the single most common reason tape bleeds.
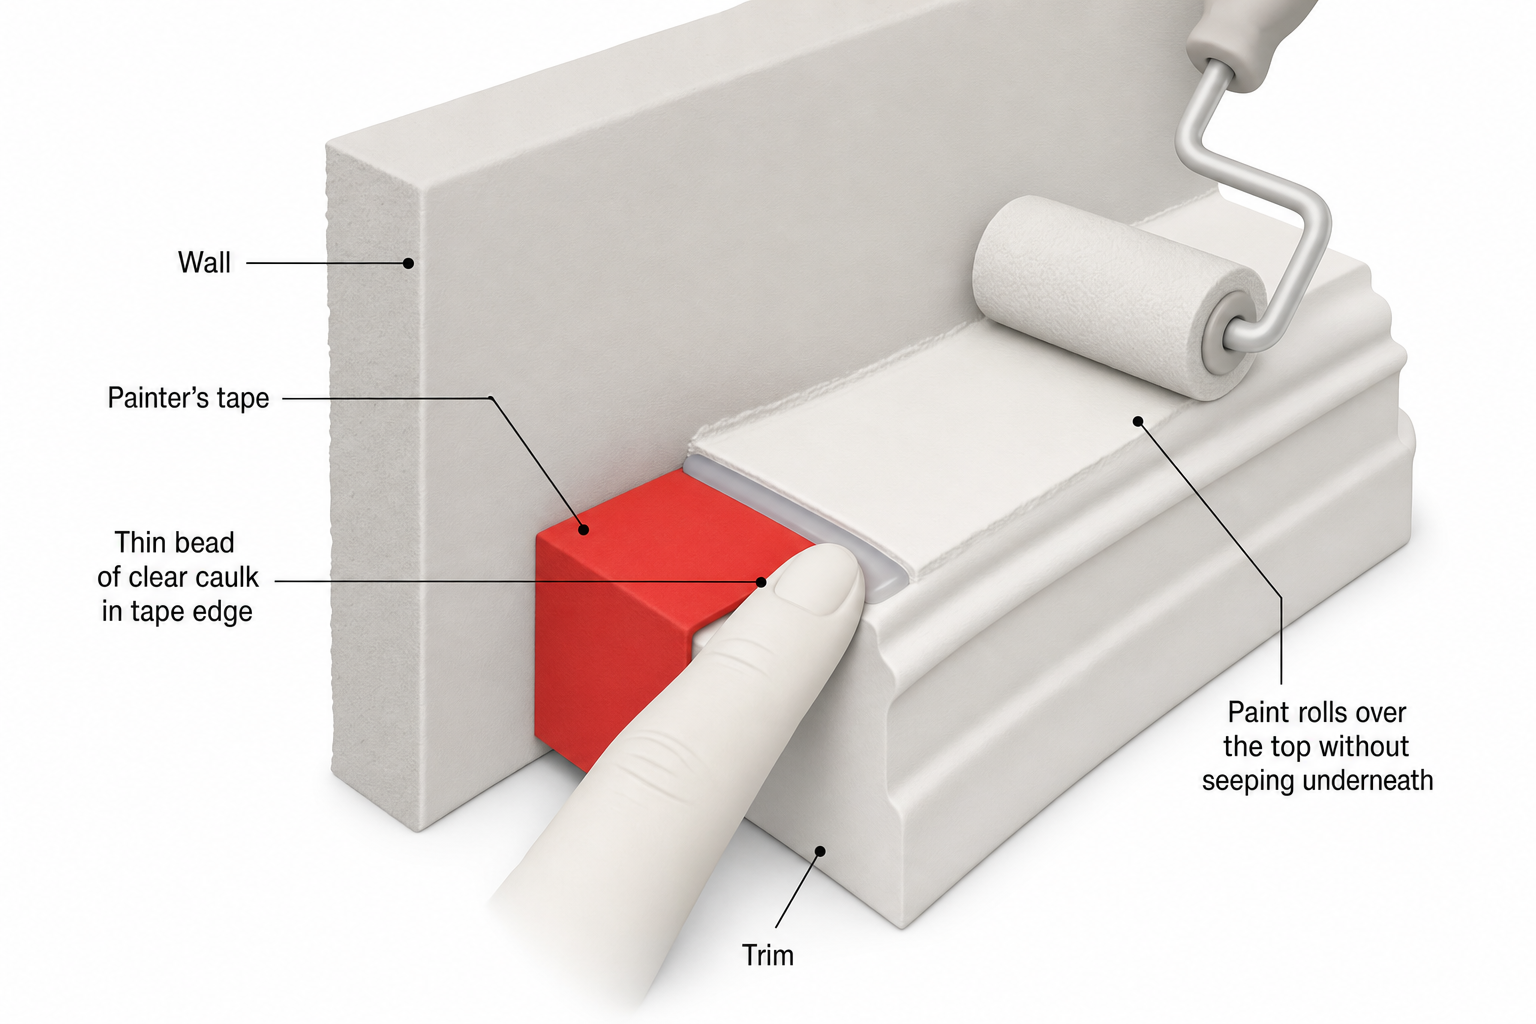
3. Run a thin bead of caulk along the tape edge
Load your caulking gun and run a very thin, continuous bead of paintable caulk directly along the edge of the tape where it meets the surface you're about to paint. You want a bead roughly the diameter of a pencil lead — too much caulk creates a ridge that will show through the paint.
4. Smooth the caulk with a wet finger or damp cloth
Immediately after laying the bead, run a damp finger along it to press it into the seam and remove the excess. Wipe your finger on a rag between passes. The goal is a caulk line so thin it's barely visible — its job is to fill the gap under the tape edge, not to be a visible bead itself. Let this cure according to the caulk's label instructions, often 30in — wait, disregard that; follow the manufacturer's stated cure time, which is commonly somewhere between 30 minutes and a few hours depending on humidity and caulk type.
5. Paint as usual, working away from the tape edge
Once the caulk has skinned over (tacky-dry, not wet), apply your topcoat with a brush or roller. Work in the direction away from the taped edge where possible, and avoid overloading the brush right at the line — a heavily loaded brush pressed directly into the tape edge is more likely to force paint underneath even with caulk in place.
6. Pull the tape at the right time
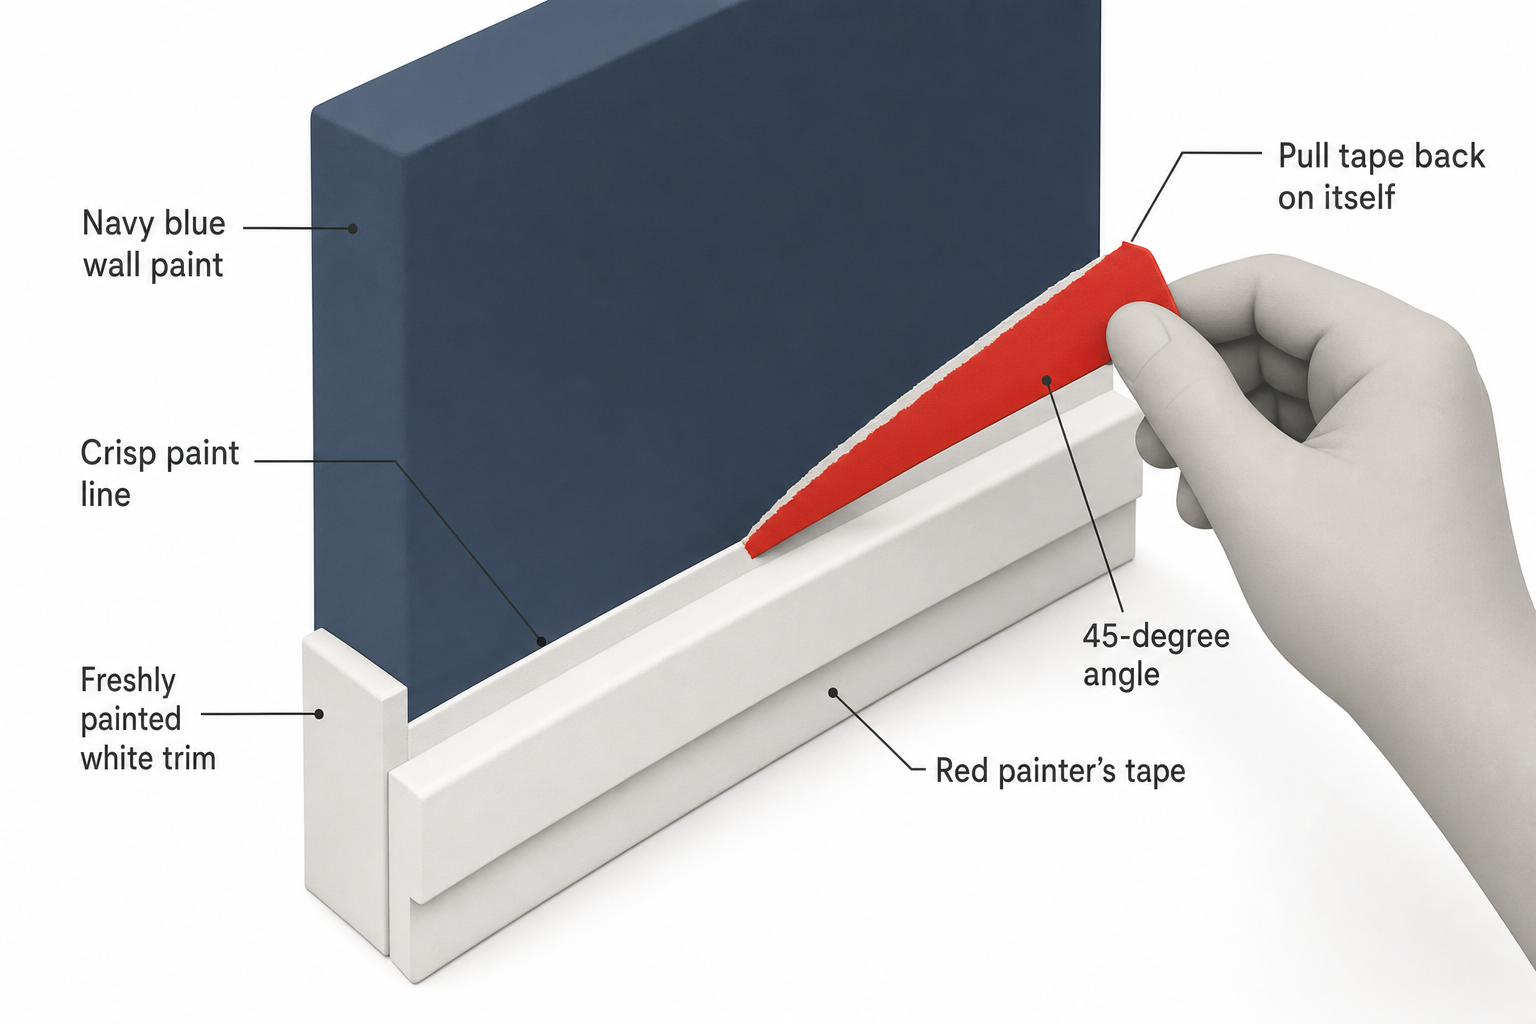
Remove the tape while the paint is still slightly wet to the touch, typically within an hour or two depending on the paint's dry time — pulling too late risks tearing dried paint film along with the tape. Pull it back on itself at a 45-degree angle, slowly and steadily, rather than straight up or too fast.
Alternative: The "Paint-Seal" Trick (No Caulk Needed)
If you don't want to deal with caulk, there's a simpler variant that works well for wall-to-wall color changes (not just wall-to-trim): after taping and burnishing, brush a very thin coat of the base color — the color already on the wall, or the color on the side the tape is protecting — directly over the tape edge before your finish color. This seals the tape with paint that matches what's underneath, so if it bleeds, it bleeds in a color you can't see. Let that seal coat dry, then apply your actual finish color on top. This is faster than caulking but slightly less effective on heavily textured surfaces.
Common Mistakes That Cause Bleed-Through
- Using old or bargain tape that has lost tackiness or wasn't designed for the surface
- Taping over dust or old flaking paint instead of prepping first
- Skipping the burnish step — this alone accounts for most bleed complaints
- Applying too much caulk, creating a visible ridge once painted
- Leaving tape on too long, causing dried paint to tear away with it instead of leaving a clean edge
- Painting in one heavy coat right at the tape line instead of two thinner coats
Working on Textured or Uneven Trim
Older homes often have trim with layers of built-up paint, slightly warped wood, or textured walls (orange peel or knockdown finishes) where tape struggles to seal no matter how well you burnish it. In these cases, the caulk-sealing step becomes essential rather than optional — the caulk fills gaps the tape physically cannot bridge. For heavily textured walls, consider running a slightly thicker caulk bead (still no wider than about 0.25in) and allow extra cure time before painting over it.
FAQ
Does this method work for painting stripes or geometric patterns on walls, not just trim? Yes. The same caulk-seal or paint-seal technique works for any tape line, including stripes, chevrons, or color-blocked accent walls. Apply the seal coat in whichever color is already there or will remain visible if bleed occurs.
Can I skip the caulk if I use premium painter's tape? Premium tapes reduce bleed risk significantly on smooth surfaces, but they don't eliminate it on textured or uneven surfaces. If you want guaranteed crisp lines, sealing the tape edge is cheap insurance regardless of tape quality.
How long should I wait before pulling the tape? This depends on your paint's dry-to-touch time, often listed on the can, but a common approach is to pull tape while the paint is still slightly tacky, generally within an hour or two of the final coat, rather than waiting until it's fully cured.
What if I still see a little bleed after trying this method? Let the paint fully cure, then touch up the thin bleed line with a small artist's brush and the correct color rather than re-taping the whole area — it's usually a five-minute fix.
Is caulking necessary for masking off a ceiling line? It's optional but helpful, especially on textured (popcorn or knockdown) ceilings where tape rarely seals perfectly. A thin seal coat of ceiling-white paint over the tape edge before your wall color often gives a cleaner result.