
Small nail holes are the most common drywall repair homeowners face, usually left behind after taking down picture frames, mirrors, or shelving before a repaint. The good news is that a single nail hole is a five-minute fix that costs almost nothing — as long as you use the right material and don't rush the drying and sanding steps. Skipping those two things is why so many patched walls still show a faint dot or ring once paint goes on.
What You'll Need
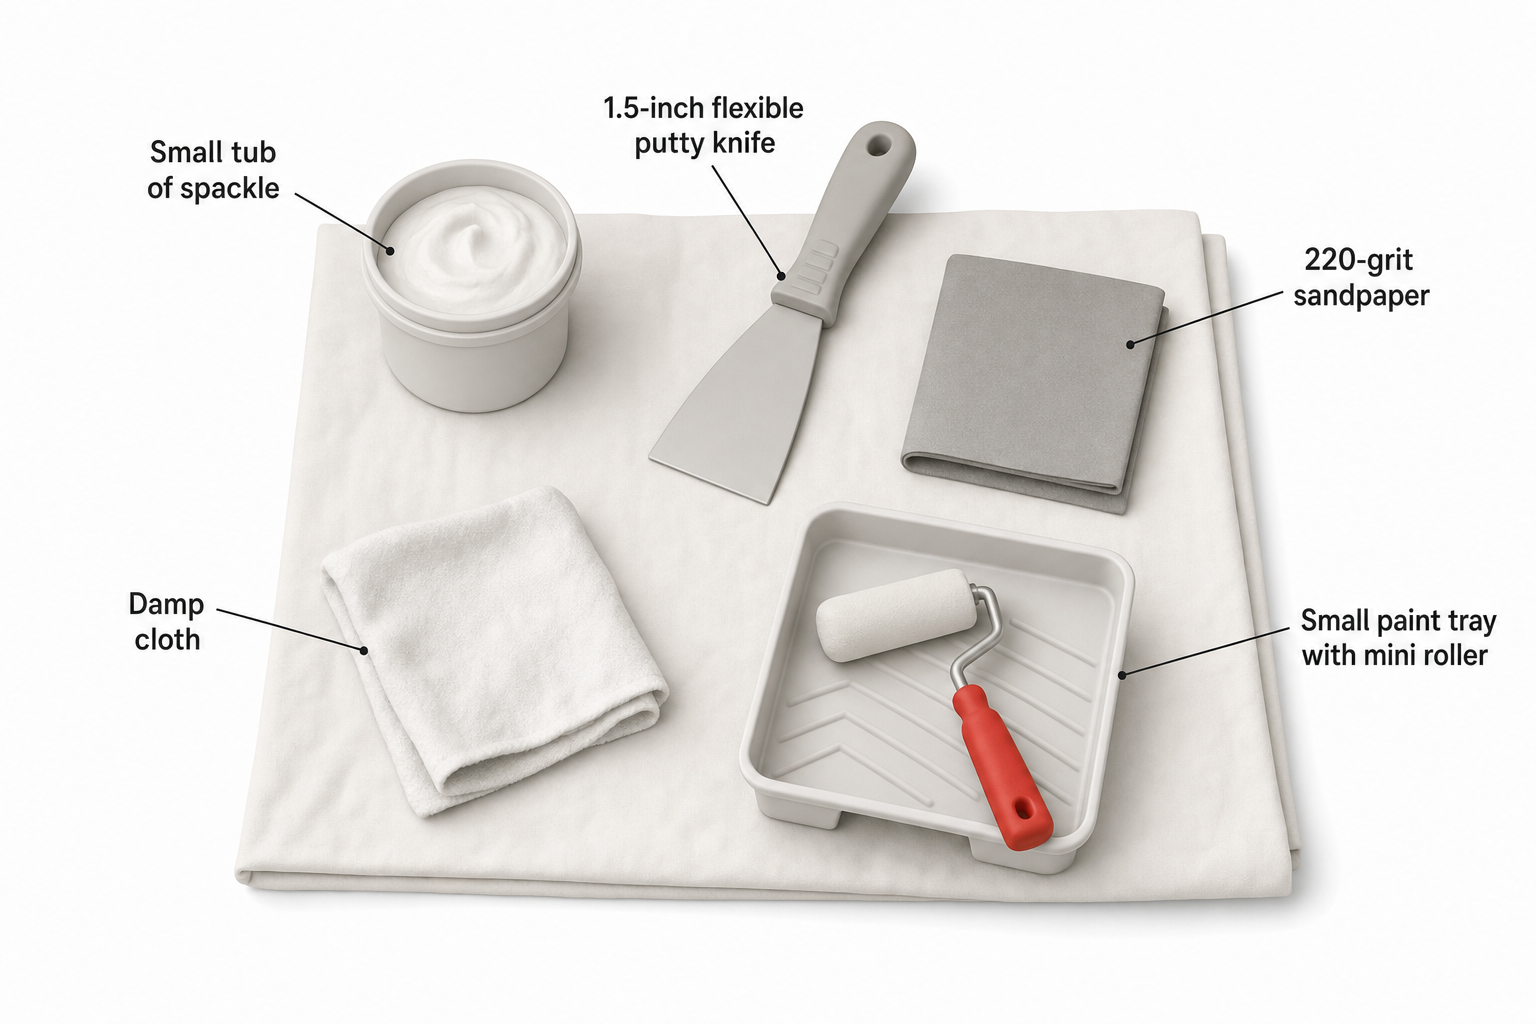
- Lightweight spackle or a vinyl spackling compound (for small holes under about 1/4 inch, avoid heavier joint compound — it shrinks more and takes longer to cure)
- A flexible putty knife, 1 to 2 inches wide
- Fine-grit sandpaper (220-grit) or a sanding sponge
- A damp microfiber cloth
- Primer (spot primer or leftover wall paint mixed with a bit of drywall primer)
- Matching paint for the final coat
Step 1: Clean and Assess the Hole
Run your finger over the hole to check for any raised, torn paper edges or loose drywall crumbs. If the paper is torn or peeling around the hole, press it back down or trim the loose bits away with a utility knife so you're not spackling over a flap that will bubble later. Wipe away dust with a dry cloth — spackle won't bond well to a dusty surface.
For a true nail hole (not a screw hole or anything larger than a pencil eraser), you generally don't need mesh tape, a repair patch, or joint compound with paper tape. Those are for holes over about 1 inch or anywhere the wall has a soft or crumbling edge.
Step 2: Apply the Spackle
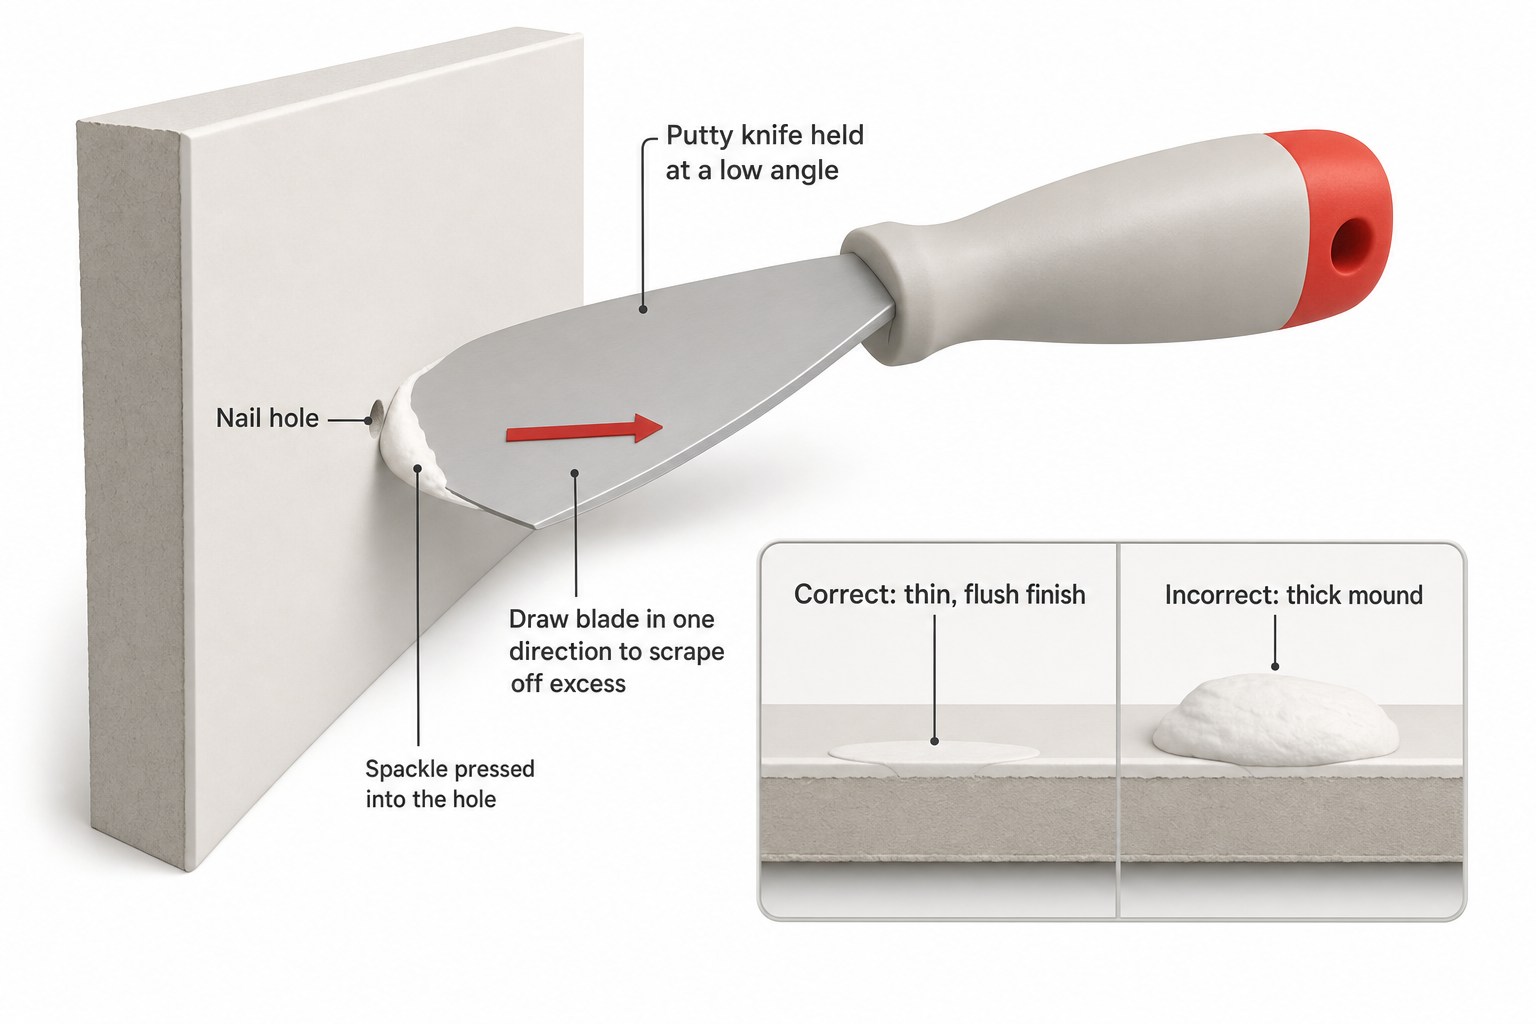
Scoop a small amount of spackle onto the tip of your putty knife — you need far less than most people expect, about the size of a pea for a single nail hole. Hold the knife at a low angle and press the spackle into the hole, then draw the blade across the surface in one direction to scrape off the excess. The goal is a paper-thin layer that sits just slightly proud of the wall surface, not a thick mound.
Lightweight and vinyl spackling compounds are formulated to shrink minimally as they dry, which is why they're preferred over all-purpose joint compound for small holes — joint compound often sinks in as it cures, forcing you to apply a second coat and lose an evening to drying time.
Step 3: Let It Dry Fully
This is the step most people rush. Manufacturers of lightweight spackle typically list a dry time of around 30 minutes to 2 hours for holes this small, but humidity, room temperature, and how thickly you applied it all affect that. A patch that looks dry on the surface can still be soft or slightly darker underneath — spackle usually lightens in color noticeably (often from gray or pink to bright white) once it's fully cured, so use that color change as your visual cue rather than just touch.a If you're unsure, wait an extra 30 minutes. Sanding or painting over a patch that isn't fully cured is the single most common reason for a visible shrunken dimple showing up days later.
Step 4: Sand It Smooth
Once cured, fold a piece of 220-grit sandpaper (or use a fine sanding sponge) and lightly sand the patch in small circular motions, feathering out slightly onto the surrounding wall. You're not trying to remove the patch — just knock down any ridge so it's flush with the wall. Run your palm flat over the area with your eyes closed; you should feel no edge or bump at all. Wipe away sanding dust with a slightly damp cloth and let it dry for a few minutes before priming.
[!safety] If you're patching a hole above shoulder height or near a stairwell, use a stable stepladder rather than standing on furniture. Falls from ladders and improvised platforms are a leading cause of home repair injuries — take the extra minute to set up properly.
Step 5: Prime Before You Paint
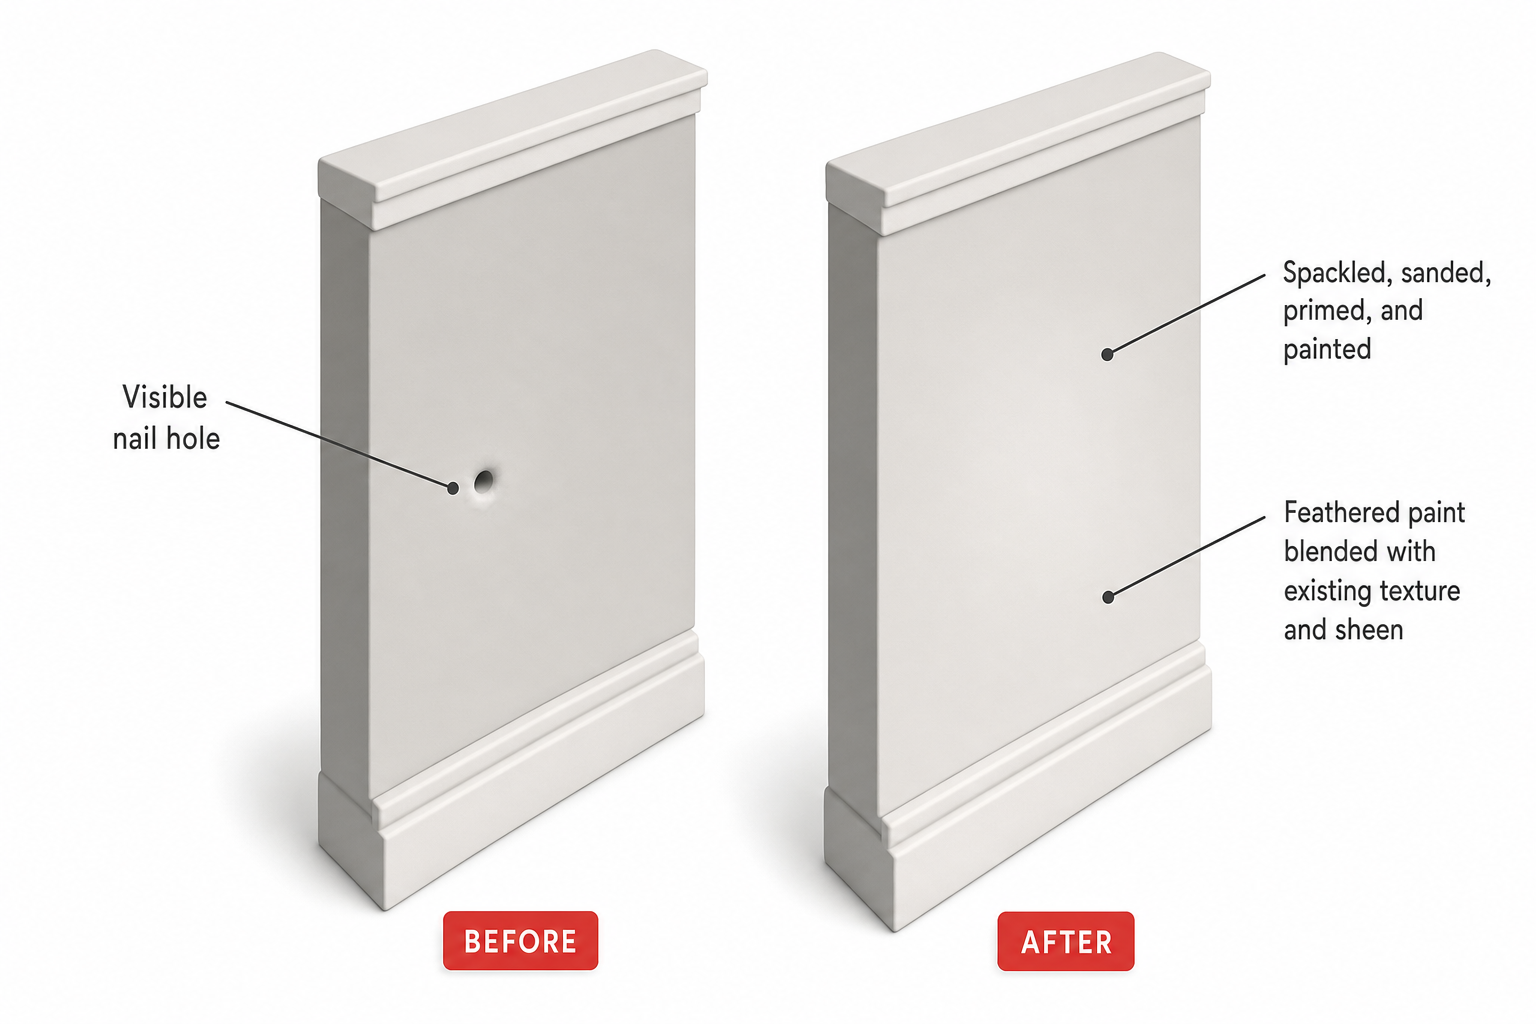
This step is what separates an invisible repair from one you can spot across the room. Spackled areas absorb paint differently than the surrounding painted wall (a phenomenon often called "flashing"), which shows up as a slightly duller or shinier patch even after a full topcoat. A small dab of primer or a stain-blocking spot primer over just the patched area evens out the porosity so your paint color and sheen match seamlessly. Let the primer dry per the label instructions (often around 30 minutes) before painting.
Step 6: Repaint the Area
For the best blend, don't just dab paint onto the exact spot — feather it out using a small foam roller or brush, blending a few inches beyond the patch in the same direction as the wall's existing roller texture. If the wall was painted with a roller, a brush-only touch-up often leaves a visible texture difference. Matching sheen matters as much as matching color: a satin patch on an eggshell wall will catch light differently even in the same color.
[!region] Paint sheen names and primer formulations can vary by manufacturer and region — always check the product label for dry and recoat times rather than relying on general rules of thumb, as some regions' humidity and climate norms affect standard drying guidance.
When to Call a Professional
A single nail hole is squarely a DIY job. But if you're dealing with multiple holes across a large section of wall, cracking that radiates outward from the hole, or any sign of water staining around the area, that can indicate a settling issue, moisture intrusion, or structural movement behind the drywall. In those cases, it's worth having a contractor or drywall specialist assess the wall before you repaint over it.
FAQ
Can I use toothpaste or soap instead of spackle? These are popular internet hacks, but they aren't a permanent fix — toothpaste and bar soap will shrink, crack, or wash out over time, especially with any humidity, and they won't take paint properly. Use actual spackle for a repair that lasts.
How long should I wait before painting over spackle? Wait until the spackle has fully changed color to its dry state (often lightening from pink or gray to white) and feels completely hard, not just dry on the surface — typically 30 minutes to a couple of hours for a small nail hole, but always check your product's label.
Do I need to sand between coats if I use two layers of spackle? For a true nail hole, one thin coat is usually enough. If you do need a second coat because the first sank in slightly, let it dry fully and give it a light sand before the second coat to help it bond evenly.
Why does my patched spot still show up after painting? This is almost always caused by either incomplete drying before painting, skipping the primer step (causing a flashing or sheen difference), or not feathering the paint out far enough to blend with the surrounding texture.
Is spackle the same as joint compound? No. Spackle is a premixed, fast-drying compound best suited to small holes and dents. Joint compound is designed for taping and finishing larger drywall seams, dries more slowly, and shrinks more, making it less ideal for a quick nail-hole fix.