
That maddening plink... plink... plink at 2 a.m. isn't just annoying — it's also wasting water and usually signals a worn part that's cheap and easy to replace. Here's how to stop a faucet from dripping right now so you can get back to sleep, plus the permanent fix for tomorrow.
The 2-Minute Emergency Fix (Do This Tonight)
You don't need tools or even to get fully dressed for this. The goal is just to stop the noise and the waste until you can do the real repair in daylight.
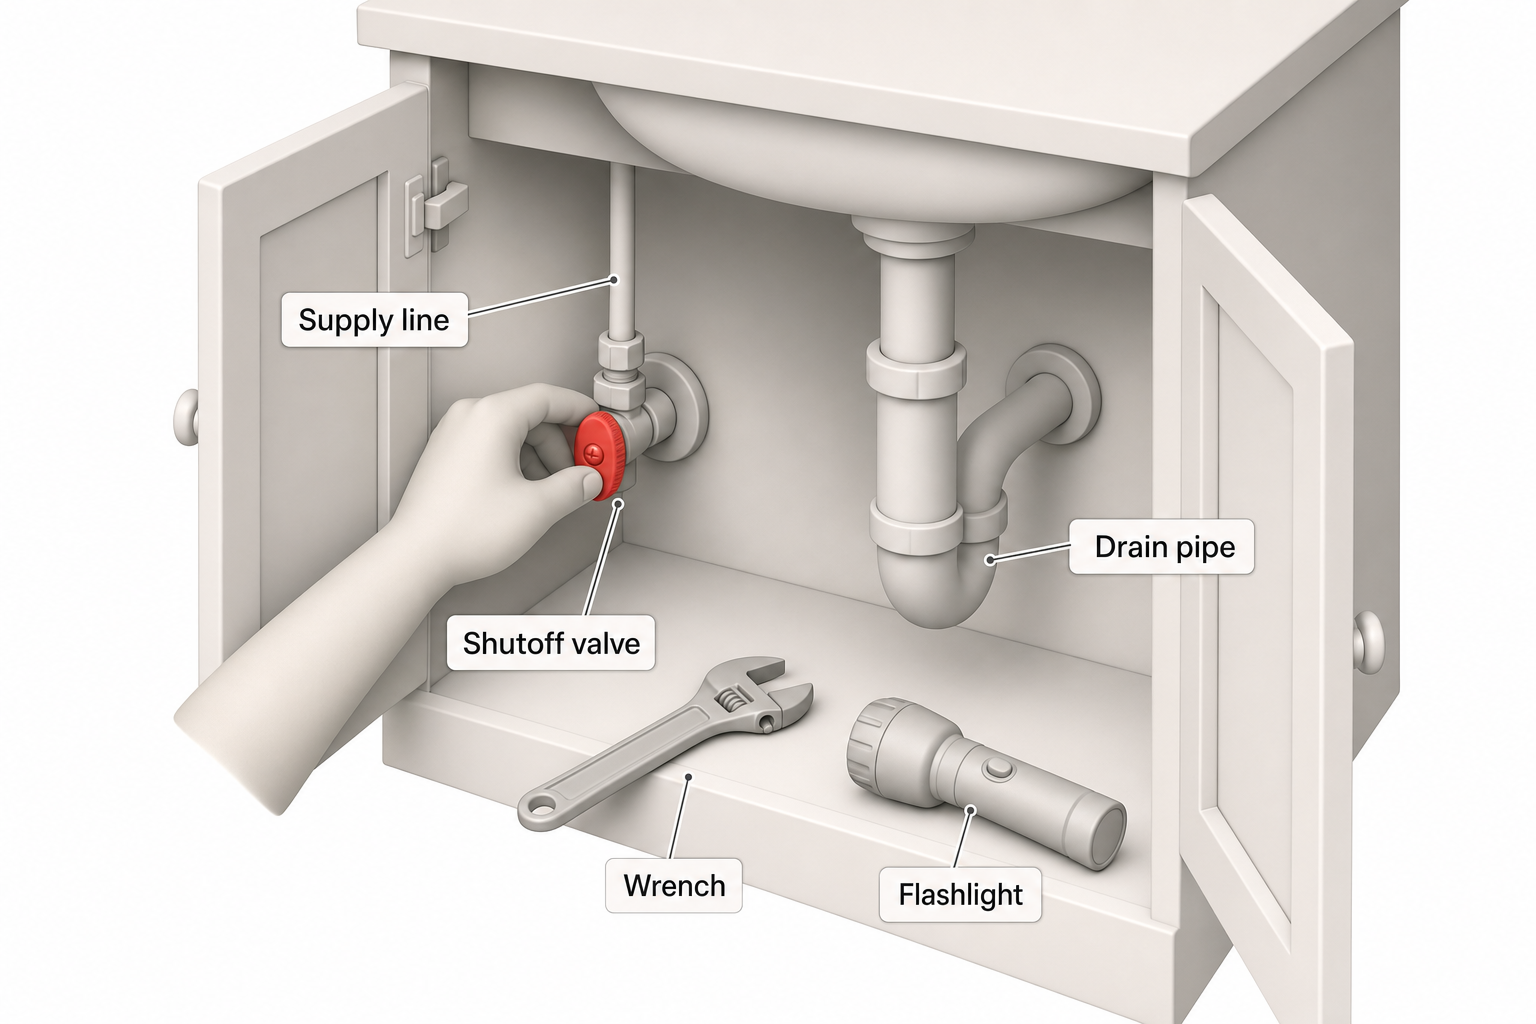
- Shut off the faucet's supply valves. Look under the sink for two small oval or round handles on the pipes coming out of the wall or floor — one for hot, one for cold. Turn each clockwise until snug. This isolates just that fixture without killing water to the rest of the house.
- No shutoff valves under the sink? This is common in older homes. Instead, turn off the main water shutoff valve for the house (typically near the water meter, in a basement, crawlspace, or utility closet) and turn it clockwise.
- Open the faucet handle briefly to release residual pressure and confirm the drip has stopped.
- Muffle any remaining drip if you can't fully isolate the line: lay a folded towel in the sink basin, or point the faucet spout so any residual drops land directly on porcelain or into standing water rather than an empty basin — it cuts the noise dramatically until morning.
This buys you time. The drip itself is a symptom — a worn washer, O-ring, or cartridge is letting water sneak past the internal seal. That needs a proper fix.
The Permanent Fix: Diagnose Your Faucet Type
Once you're ready to fix it for good, the repair depends on which of the four common faucet mechanisms you have. Turn off both supply valves and the main if needed before opening anything up.
1. Compression Faucets (Separate Hot & Cold Handles)
These are common in older homes and almost always the cause of a slow, worsening drip.
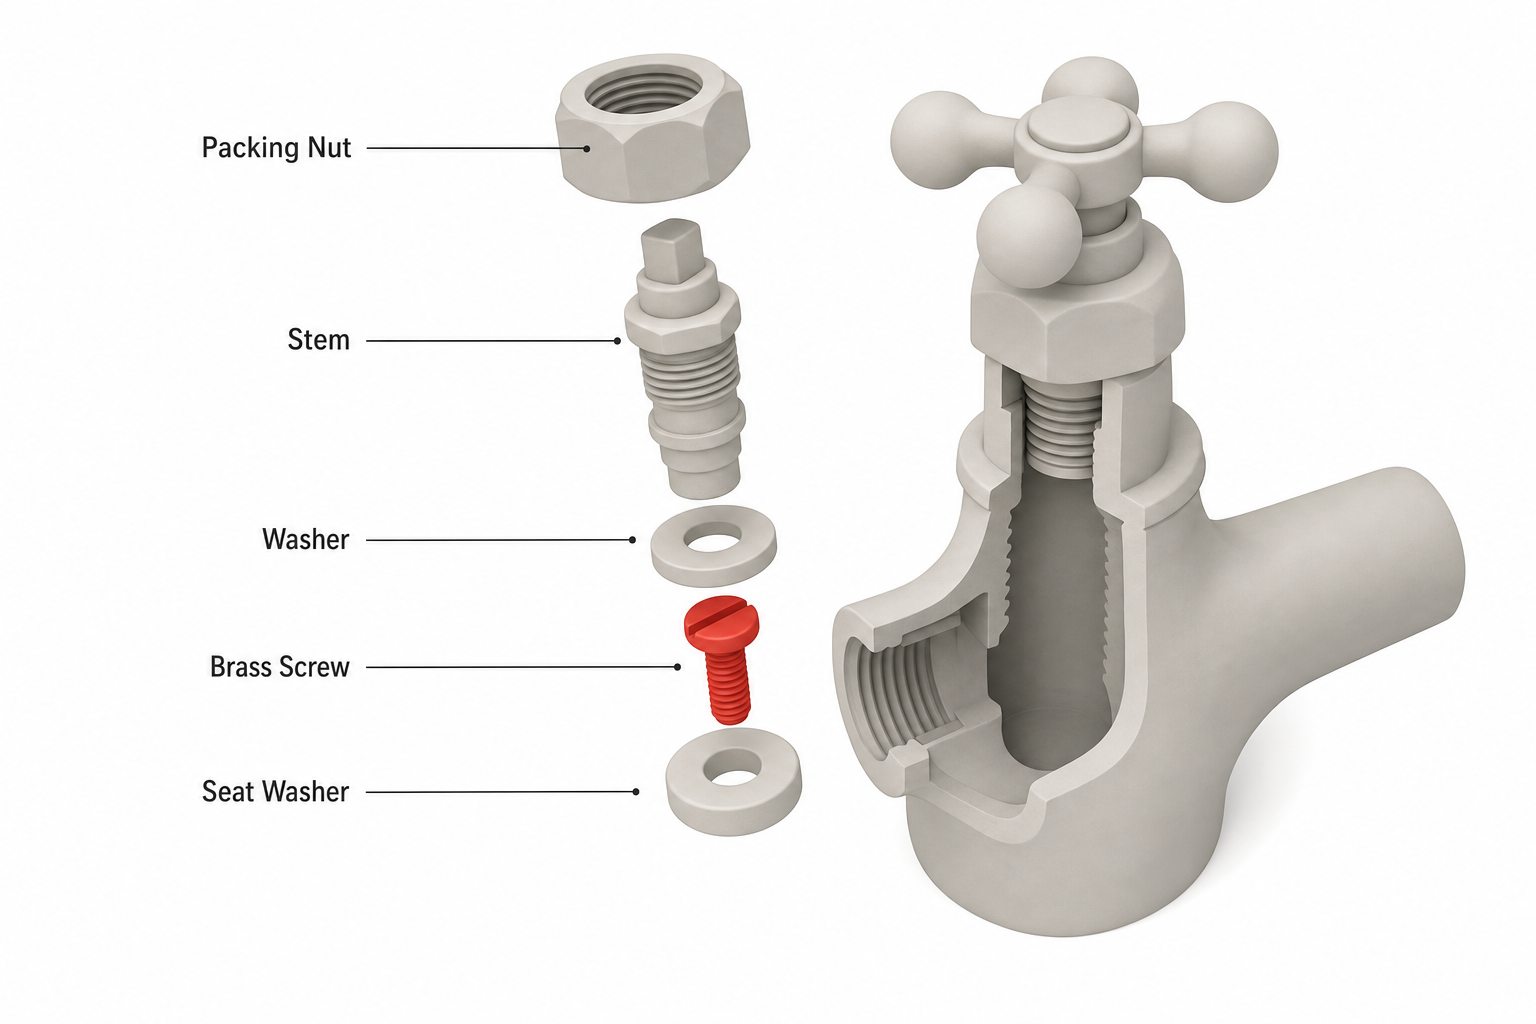
- Pry off the decorative cap on top of the handle and remove the screw underneath.
- Lift off the handle, then unscrew the packing nut with an adjustable wrench.
- Pull out the stem assembly. At the bottom you'll find a rubber washer held by a brass screw.
- Replace the washer with an exact match in diameter and thickness — a wrong size will still drip or won't seal at all. Also inspect the seat washer (O-ring higher on the stem) and swap it if it's flattened or cracked.
- If the drip persists after a fresh washer, the metal valve seat inside the faucet body may be pitted or corroded. A seat-dressing tool (a seat wrench/reseating tool) can resurface it, or the seat can be replaced if it's the removable type.
- Reassemble in reverse order, hand-tighten the packing nut, then snug it with a wrench — don't overtighten, which can crack the housing.
2. Ball Faucets (Single Handle, Ball-Shaped Cam Inside)
Common on many kitchen single-handle faucets.
- Loosen the set screw at the base of the handle with an Allen wrench and remove the handle.
- Unscrew the domed cap and remove the cam, cam washer, and rotating ball.
- Inspect the ball for scoring or wear; replace the springs and rubber seats beneath where the ball sits, and the cam washer.
- Most manufacturers sell repair kits sized for their specific faucet — matching the kit to your model matters more here than with compression faucets, since ball assemblies vary significantly between brands.
- Reassemble, aligning the cam's lug with the notch in the faucet body so the handle moves correctly.
3. Cartridge Faucets (Single Handle, Straight Up-Down Lever)
- Remove the handle screw (often under a cap) and lift off the handle.
- Remove the retaining clip or nut holding the cartridge in place.
- Pull the cartridge straight up and out — needle-nose pliers help if it's stuck from mineral buildup.
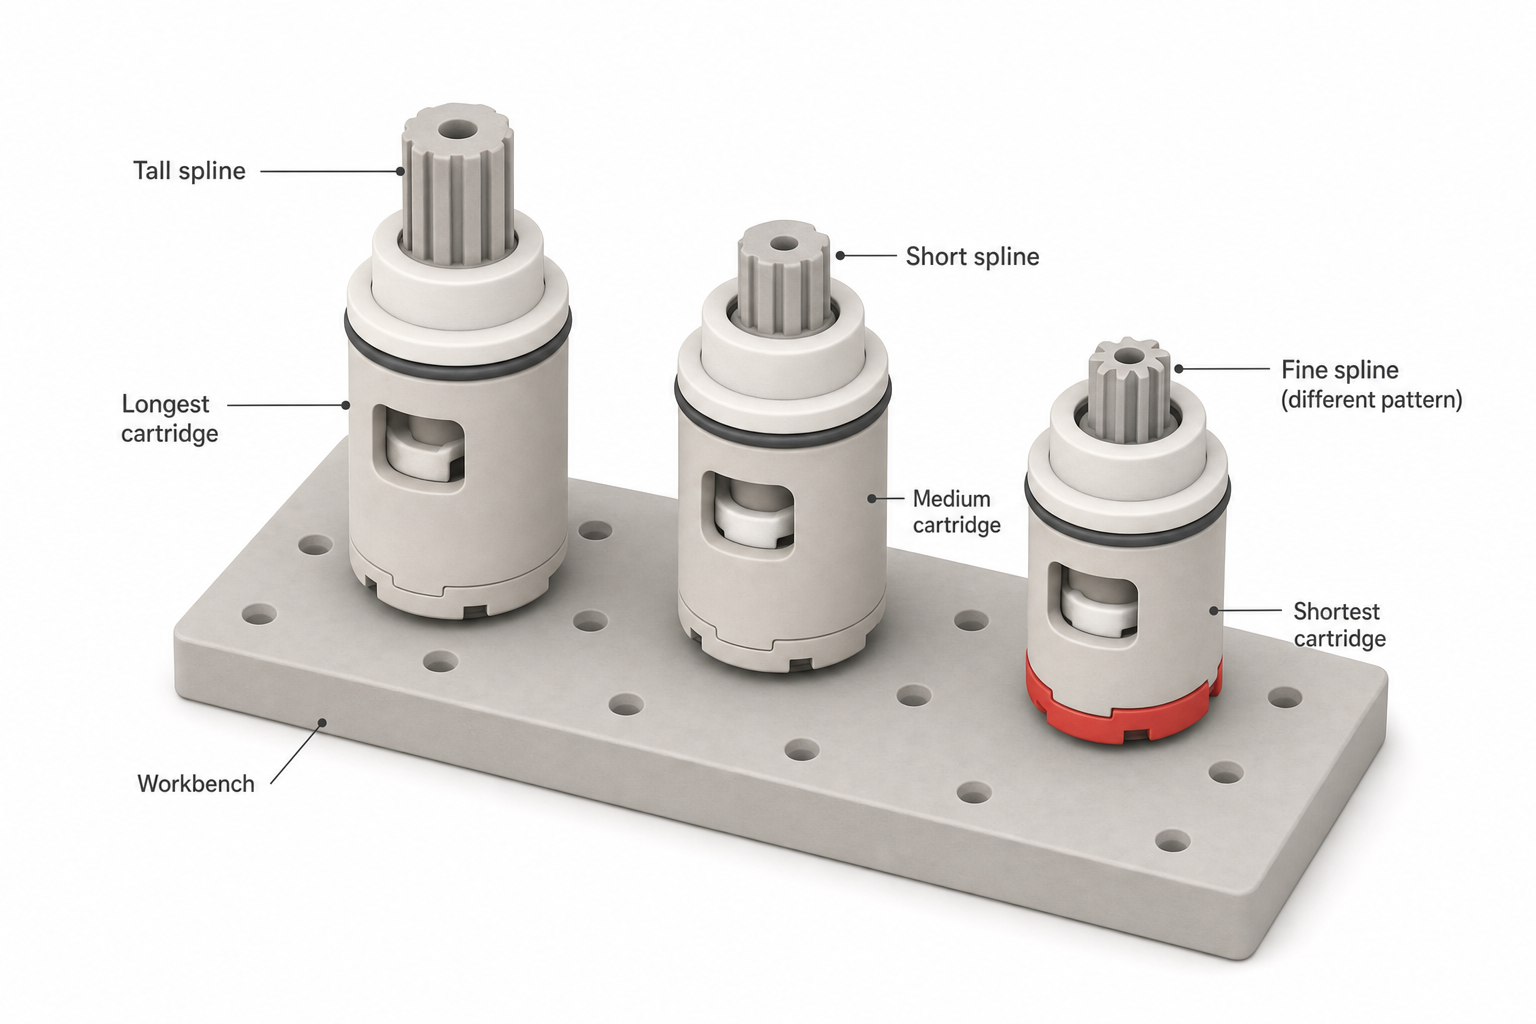
- Replace it with an identical cartridge (bring the old one to compare, since even faucets that look alike often use different cartridge heights or spline patterns).
- Reinsert, ensuring the flat side or alignment tab matches its original orientation, then reassemble.
4. Disc Faucets (Single Handle, Wide Cylindrical Body)
- Lift the handle and remove the set screw underneath.
- Unscrew the escutcheon cap to expose the cylinder.
- Remove the two or three mounting screws holding the ceramic disc cylinder and lift it out.
- Inspect the neoprene seals on the underside of the cylinder — these are the usual culprits — and replace them, or replace the whole cylinder if the ceramic discs are chipped or scratched.
- Clean any mineral deposits from the faucet body's inlet ports before reinstalling, since debris here can also cause a persistent drip.
After the Repair: Testing and Preventing Recurrence
- Turn the supply valves back on slowly and check under the sink for leaks at the valve connections before walking away.
- Run the faucet through several full on/off cycles and check both the spout and the handle base for seepage.
- If it still drips, the most likely causes are: a wrong-size replacement part, a valve seat that needs resurfacing, or a second worn component you didn't replace at the same time (it's often worth replacing washers, O-rings, and seals as a set rather than one at a time).
- In areas with hard water, mineral buildup accelerates wear on washers and seals. Occasional descaling of the faucet aerator and periodic inspection can extend the life of a repair.
When to Call a Plumber Instead
Call a licensed plumber if: the shutoff valves won't close, you find corrosion or a leak inside the wall or under the floor, the faucet body itself is cracked, or you've replaced the obvious wear parts and the drip continues. Persistent leaks after a proper repair sometimes point to water pressure that's too high for the fixture, which a plumber can diagnose with a pressure gauge.
FAQ
Why does my faucet only drip at night? It's not actually worse at night — the house is just quieter, so a drip that's masked by daytime noise becomes noticeable once everything else goes silent. The underlying leak rate is usually constant.
Can I just tighten the handle to stop the drip? Sometimes tightening the packing nut slightly reduces a drip temporarily, but it's treating the symptom, not the cause. The worn washer, cartridge, or seal underneath still needs replacing, or the leak will return.
How much water does a dripping faucet actually waste? It varies with drip rate and water pressure, so it's hard to state a universal figure, but even a slow, steady drip adds up to a noticeable amount of wasted water and higher utility bills over weeks and months — enough that it's worth fixing promptly rather than living with it.
Do I need to replace the whole faucet, or just a part? Most drips can be fixed by replacing an internal part — a washer, cartridge, or seal kit — rather than the entire faucet. Full replacement is usually only necessary if the faucet body itself is cracked, corroded, or the internal parts are no longer available for that model.
What if I don't know what type of faucet I have? Look at how the handle operates: two separate hot/cold handles that you screw down usually mean a compression faucet, while a single handle that lifts and swivels is typically a ball, cartridge, or disc type. Removing the handle and photographing the mechanism, then comparing it to diagrams or bringing it to a hardware store, is a reliable way to identify it.