
That cloudy white ring left by a sweating glass or a hot mug isn't usually a stain soaked into the wood — it's moisture trapped in the finish itself. Understanding that distinction is the key to fixing it. Most white ring marks sit in the lacquer, shellac, or varnish topcoat, which means you can often draw the moisture out without ever touching the wood underneath. Dark rings are a different problem: they mean water has actually penetrated past the finish into the wood grain, and they usually need more aggressive repair. Here's how to diagnose which one you have and work through the fixes in order of least to most invasive.
Step 1: Figure Out What Kind of Ring You're Dealing With
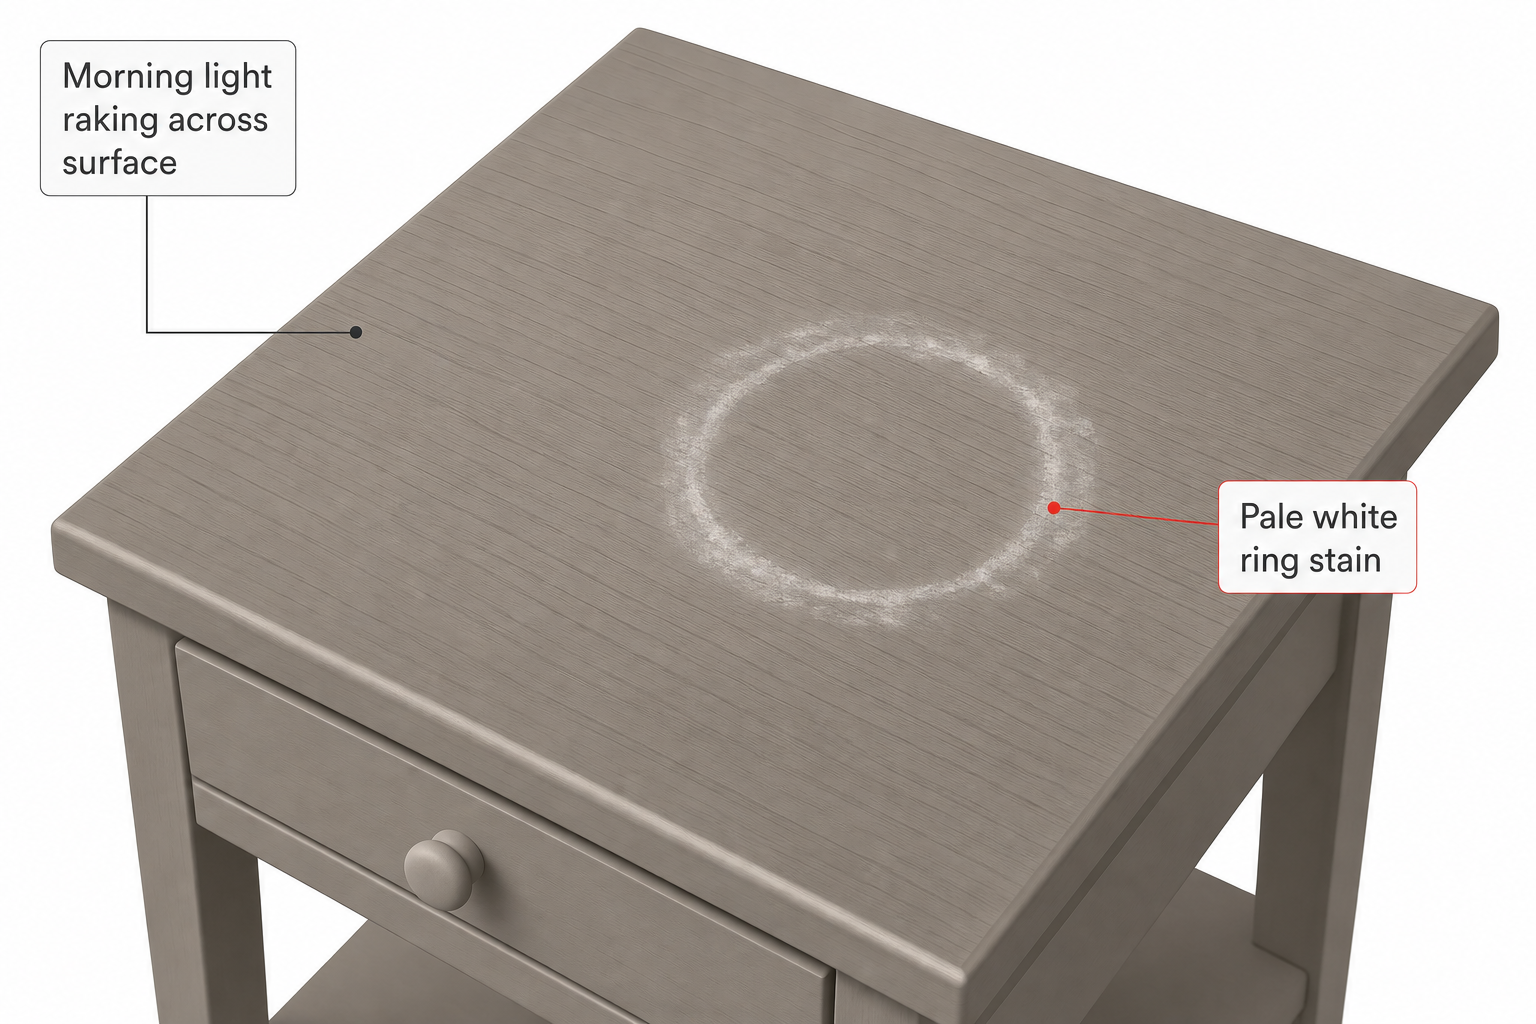
Look at the mark in good light.
- White or hazy ring, cloudy but not dark — moisture is trapped between coats of finish or in the topcoat itself. This is the easy case and responds well to heat or gentle abrasion.
- Dark ring or black spot — water has gotten through the finish and into the wood fibers, sometimes reacting with tannins in the wood. This needs finish removal and possibly bleaching or refinishing to fully clear.
Run a fingernail lightly over the mark. If it feels perfectly smooth and level with the surrounding finish, it's almost certainly a surface-level white ring. If you can feel a slight change in texture or see grain distortion, water has likely gotten deeper.
Method 1: Heat (Best First Try for White Rings)
Heat re-liquefies the trapped moisture just enough to let it evaporate back out through the finish without disturbing the wood color.
- Set a standard household iron to low heat with no steam function engaged — steam adds more moisture, which defeats the purpose.
- Lay a clean, dry cotton cloth (an old t-shirt or plain cotton towel works) directly over the ring. Avoid terrycloth, which can leave a texture imprint.
- Press the iron onto the cloth for 3-5 seconds, lift, and check the ring. Repeat in short bursts, checking often — you're trying to just warm the finish, not melt or scorch it.
- As soon as the ring lightens or disappears, stop. Continuing after that point risks softening the finish or leaving a slight sheen difference.
- Let the spot cool completely, then buff lightly with a soft cloth and, if the finish looks dull compared to the rest of the piece, apply a small amount of furniture wax or polish to blend the sheen.
A hair dryer on low-medium heat held about 6in from the surface, moved constantly, is a gentler alternative for finishes that seem thin or fragile — it takes longer but carries less risk of overheating one spot.
[!safety] Keep the iron moving in short bursts and never leave it resting on the furniture unattended, even on low heat — sustained direct contact can scorch veneer, melt certain plastic laminates, or blister old finishes.
Method 2: Mayonnaise or Petroleum Jelly (The Oil Trick)
This one sounds like an old wives' tale, but there's a real mechanism behind it: the oil in mayonnaise (or plain petroleum jelly) seeps into the microscopic cracks in the cloudy finish and physically displaces the trapped water, while also temporarily filling in light haze so it reflects light like the surrounding finish again.
- Spread a thick layer of mayonnaise or petroleum jelly directly over the ring.
- Let it sit for at least {measure:1 hour}; for stubborn rings, leave it overnight under a paper towel to keep dust off.
- Wipe away completely with a clean cloth and inspect. Some rings vanish immediately; others fade gradually and may need a second application.
- Buff the area with a soft cloth once clean to restore sheen.
This method is genuinely low-risk on most finishes since it doesn't involve heat or abrasion, which makes it worth trying on antiques or pieces with a finish you're unsure about before reaching for anything more aggressive. It works best on lighter, fresher rings and is less reliable on marks that have been there for months or years.
Method 3: Non-Gel Toothpaste or Baking Soda Paste (Mild Abrasion)
When heat and oil don't fully clear a ring, a very fine abrasive can polish out the clouded top layer of finish.
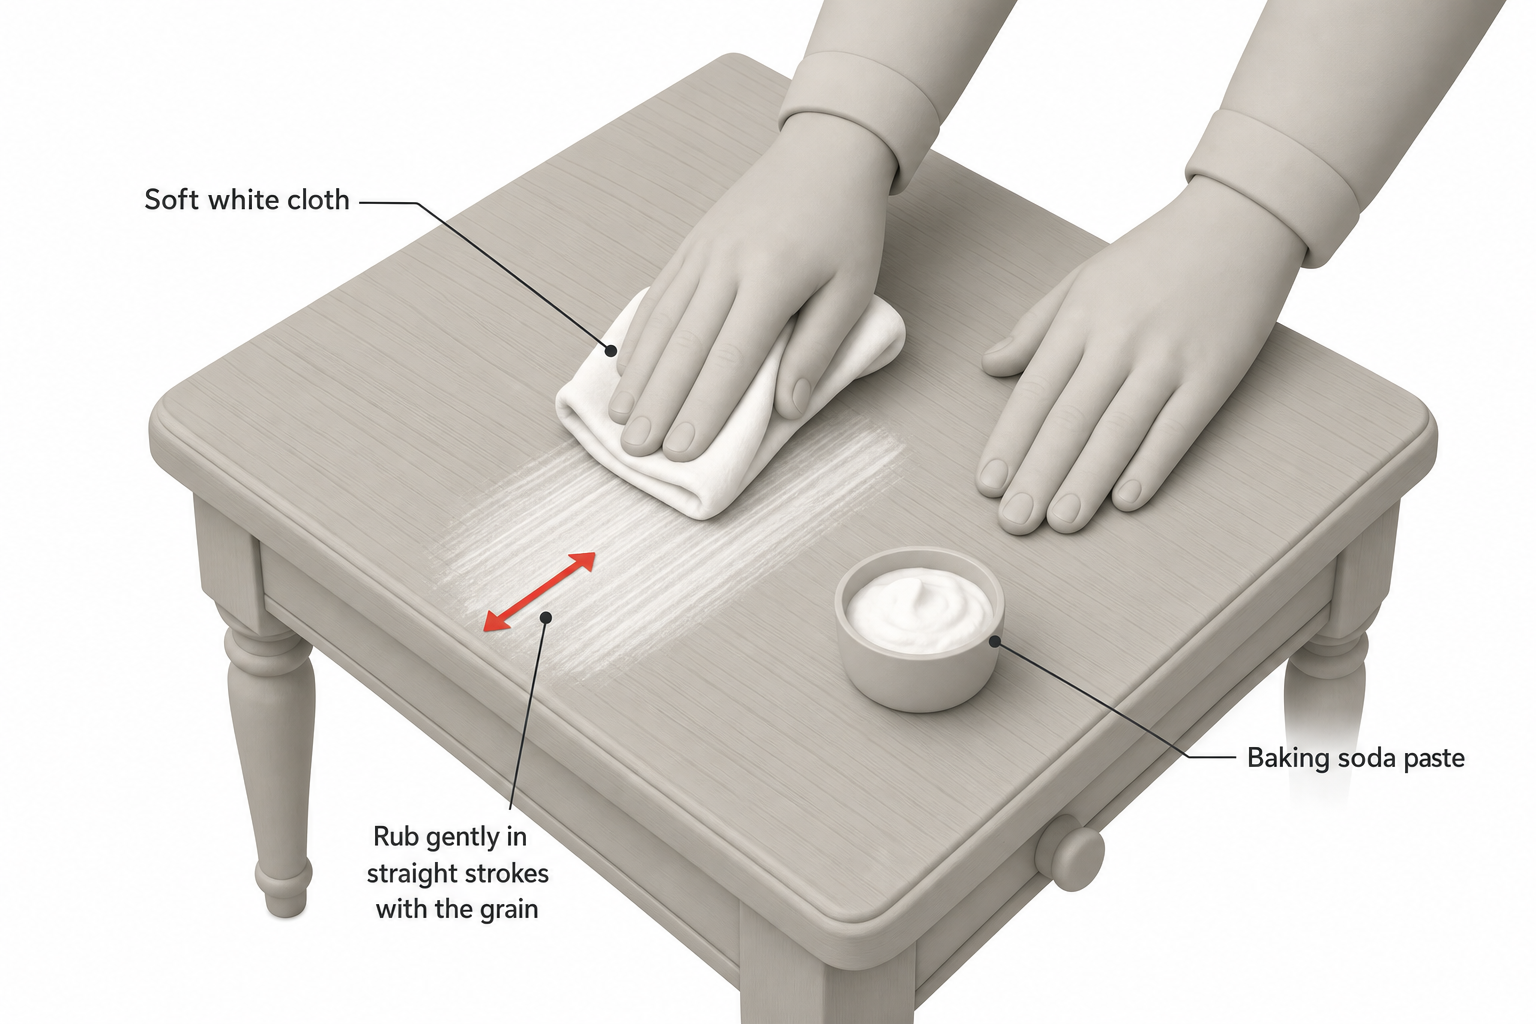
- Mix a small amount of baking soda with just enough non-gel white toothpaste to form a paste, or use plain non-gel toothpaste alone.
- Using a soft cloth, rub the paste over the ring in the direction of the wood grain with light pressure — don't scrub in circles, which can create swirl marks visible at an angle.
- Wipe clean with a damp cloth every 20-30 seconds to check progress.
- Once the ring is gone or significantly faded, wipe the area completely clean, let it dry, and apply furniture polish or wax to restore shine and protect the now slightly thinner finish layer.
This method removes a microscopically thin layer of finish along with the cloudiness, so use light pressure and stop as soon as the ring clears — over-rubbing can create a dull patch that's more noticeable than the original ring.
Method 4: Refinishing (For Dark Rings or Failed Surface Fixes)
If the ring is dark, or if white-ring methods haven't worked after a couple of honest attempts, the moisture has likely reached the wood itself and surface tricks won't pull it out.
- Strip the finish in the affected area (or the whole surface, for an even result) using an appropriate chemical stripper or by sanding down to bare wood with progressively finer sandpaper, starting around 120-grit and finishing around 220-grit.
- Assess the wood color. If a dark ring or gray-black discoloration remains in the bare wood, it's often mineral or tannin staining that plain sanding won't remove.
- Bleach the stain if needed using a wood bleach product designed for this purpose, following the manufacturer's instructions on dilution and contact time. Oxalic acid-based wood bleach is the type most commonly used for water stains specifically, as manufacturers generally market it for this purpose, though you should confirm suitability for your wood species before applying it broadly.
- Neutralize and dry the wood fully per the product instructions before refinishing — trapped bleach residue can affect how stain and finish take.
- Re-stain to match the surrounding wood as closely as possible; test on a hidden area like the underside of the piece first, since bare wood in one spot often absorbs stain differently than the aged, previously-finished wood around it.
- Reapply a matching topcoat (varnish, lacquer, shellac, or oil finish depending on what the rest of the piece uses) in thin, even coats, sanding lightly between coats with fine sandpaper.
This is a real refinishing project, not a quick fix — expect it to take a full afternoon at minimum plus drying time between coats. For valuable antiques or pieces with historical or sentimental value, this is a good point to consult a professional furniture restorer rather than risk an uneven or mismatched repair.
[!region] Some regions restrict the sale or disposal of certain chemical strippers and oxalic acid-based bleaches, and local waste authorities often require specific disposal procedures for stripper sludge and rags. Check with your local hardware supplier or municipal waste guidelines before starting.
Preventing Future Rings
- Use coasters and placemats consistently, especially under cold or hot glasses and mugs.
- Wipe up condensation or spills promptly rather than letting a glass sit for hours.
- Keep furniture out of direct sun and away from radiators or vents, since finishes that are already stressed by heat and UV exposure tend to show water damage more readily.
- Periodically wax or polish wood furniture with a product appropriate to its finish type — a well-maintained topcoat resists moisture penetration far better than a dry, worn one.
FAQ
Will the iron method work on a painted or laminate surface? No — heat is meant for clear finishes like lacquer, shellac, or varnish over real wood or wood veneer. On painted furniture or laminate, heat can soften paint, melt certain laminates, or cause bubbling, so stick to the mayonnaise or mild abrasive methods instead, and test in an inconspicuous spot first.
How long can a water ring sit before it becomes permanent? There's no fixed timeline since it depends on the finish type, wood species, and how much moisture penetrated, but generally the fresher the ring, the better your odds with heat or oil methods. Rings that have been present for months and have turned dark are much more likely to require refinishing.
Can I use actual olive oil or vegetable oil instead of mayonnaise? Plain oils can offer some improvement since the oil-displacement mechanism is similar, but mayonnaise's slight acidity and emulsified texture seem to work more reliably for many people; petroleum jelly is a cleaner, less messy alternative that many recommend for the same reason.
Is it safe to try more than one method in a row? Yes, generally you can try heat first, then mayonnaise or petroleum jelly, then a mild abrasive paste, moving to the next only if the previous one doesn't fully clear the ring. Just let the surface dry and cool fully between attempts and avoid combining heat with oil at the same time.
What if the ring is on an antique or valuable piece? Test any method on a hidden area first, such as the underside of a leaf or the back of a leg, and consider consulting a professional furniture conservator before attempting anything beyond the gentlest oil-based method, since aggressive fixes can significantly reduce an antique's value.