
Mold in bathroom caulk is one of those problems that seems to come back no matter how hard you scrub. That's usually because surface cleaning kills the mold you can see but leaves spores and root-like filaments (hyphae) inside the porous silicone or latex caulk itself. To actually get rid of it for good, you need to know which cleaning method fits the situation — and when cleaning isn't enough and the caulk needs to be pulled and replaced.
This guide compares the three real options — chlorine bleach, oxygen-based cleaners, and full re-caulking — so you can pick the right one instead of repeating the same losing scrub-and-spray cycle every month.
Why Mold Keeps Coming Back
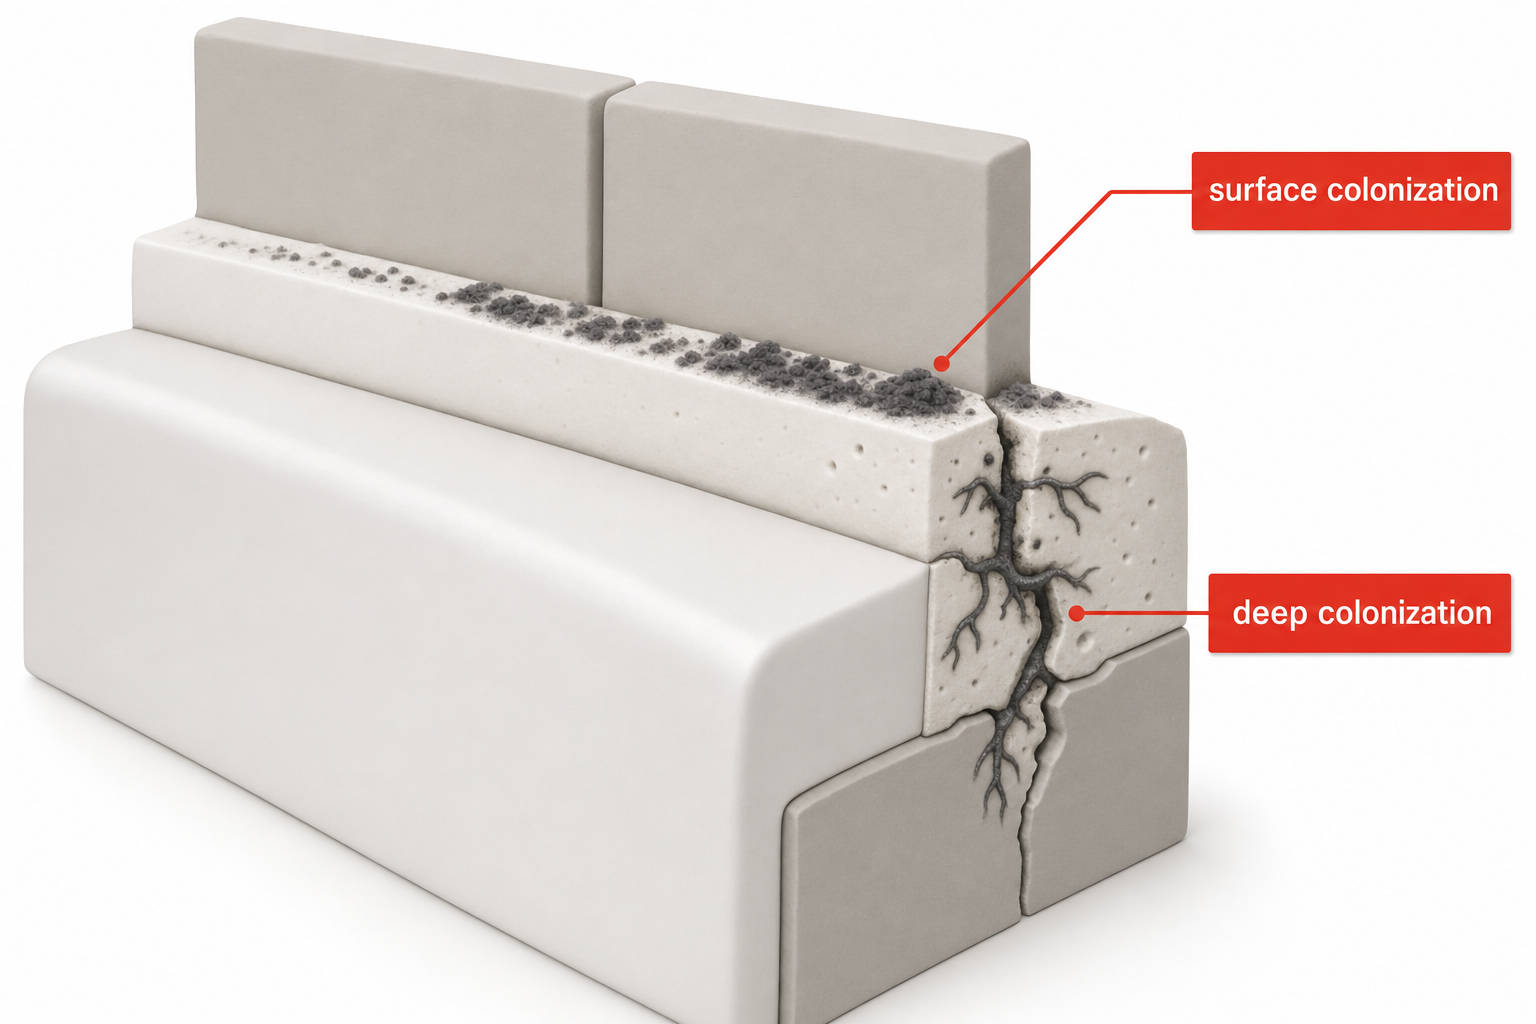
Caulk is a flexible, slightly porous material. Mold spores land on it, feed on soap scum and skin cells in the surface film, and send tiny filaments down into microscopic gaps and pinholes. A surface wipe with any cleaner will bleach or kill the visible black or pink discoloration, but if the mold has colonized deeper into the caulk bead, it regrows in as little as 1in of caulk within days to weeks because the moisture and food source are still there.
The telltale sign that cleaning won't be a permanent fix: the staining is inside the caulk (it looks gray or black all the way through, not just on top), the caulk has pulled away from the tub or wall, or you can see mold on both sides of a crack. In those cases, skip straight to re-caulking below.
Option 1: Chlorine Bleach
Bleach is the fastest and cheapest way to kill surface mold and restore whiteness to caulk, and it's effective against most common bathroom mold species on contact.
How to do it:
- Ventilate the bathroom — open a window and run the exhaust fan.
- Mix a solution of about one part household bleach to three parts water, or use it undiluted for heavy staining, in a spray bottle.
- Spray the caulk line generously and let it sit for 10in — actually, let it dwell for 10 to 15 minutes (do not let it dry out; re-spray if needed).
- Scrub gently with a soft-bristle brush or old toothbrush.
- Rinse thoroughly with water and dry the area with a towel or fan.
The catch: bleach whitens and kills surface mold well, but it does not penetrate deep into porous caulk, and it can actually break down the elasticity of caulk over repeated use, making it crack and shrink faster. If mold returns within a couple of weeks in the same spot, it was living below the surface and bleach alone won't solve it long-term.
[!safety] Never mix bleach with ammonia or with other cleaning products, especially anything containing acids (like some limescale removers) — the combination produces toxic gas. Wear gloves and keep the room ventilated while using bleach.
Option 2: Oxygen-Based (Non-Chlorine) Cleaners
Oxygen bleach cleaners — the powdered or gel type based on sodium percarbonate, often marketed as "oxygen cleaner" or found in some multi-purpose mold sprays — work differently. They release oxygen bubbles that lift mold and soap residue out of pores and textured surfaces rather than just bleaching color. Many people find them gentler on caulk and grout over repeated use, and they don't carry the same fumes or mixing hazards as chlorine bleach.
How to do it:
- Make a thick paste with oxygen cleaner powder and a small amount of water, or use a ready-made gel product (see the recommendations below for suitable options).
- Apply the paste directly onto the caulk line, packing it into any cracks or texture.
- Cover with a strip of plastic wrap pressed onto the paste to keep it from drying out, and leave for 1ft — actually, leave it for 1 to 4 hours, or overnight for heavy mold.
- Remove the wrap, scrub with a soft brush, and rinse well.
Oxygen cleaners tend to do a better job of reaching into the surface texture of caulk than a quick bleach spray, largely because of the longer dwell time, but they still won't fix caulk where mold has taken hold below a crack or where the caulk has separated from the tub.
Which Method to Choose
- Light, recent surface mold, caulk still firm and adhered: bleach spray is fine and fastest.
- Recurring surface mold, or caulk with texture/pitting that traps grime: oxygen cleaner paste with a long dwell time usually outperforms bleach.
- Staining that goes through the caulk, cracking, peeling, or gaps behind the bead: neither cleaner will permanently fix it — the caulk needs to come out.
Option 3: Strip and Re-Caulk (The Permanent Fix)
When mold has colonized the caulk itself, cleaning is treating a symptom. Removing the moldy caulk entirely and replacing it with a fresh, mold-resistant bead is the only way to guarantee it's actually gone rather than just less visible.
What You'll Need
- A caulk removal tool or a sharp utility knife
- Rubbing alcohol or a caulk-safe surface cleaner
- Painter's tape
- A caulking gun and a tube of silicone or siliconized latex caulk rated "kitchen & bath" or mold-resistant
- A caulk finishing tool or a gloved fingertip
- Disposable gloves and a dust mask
Steps
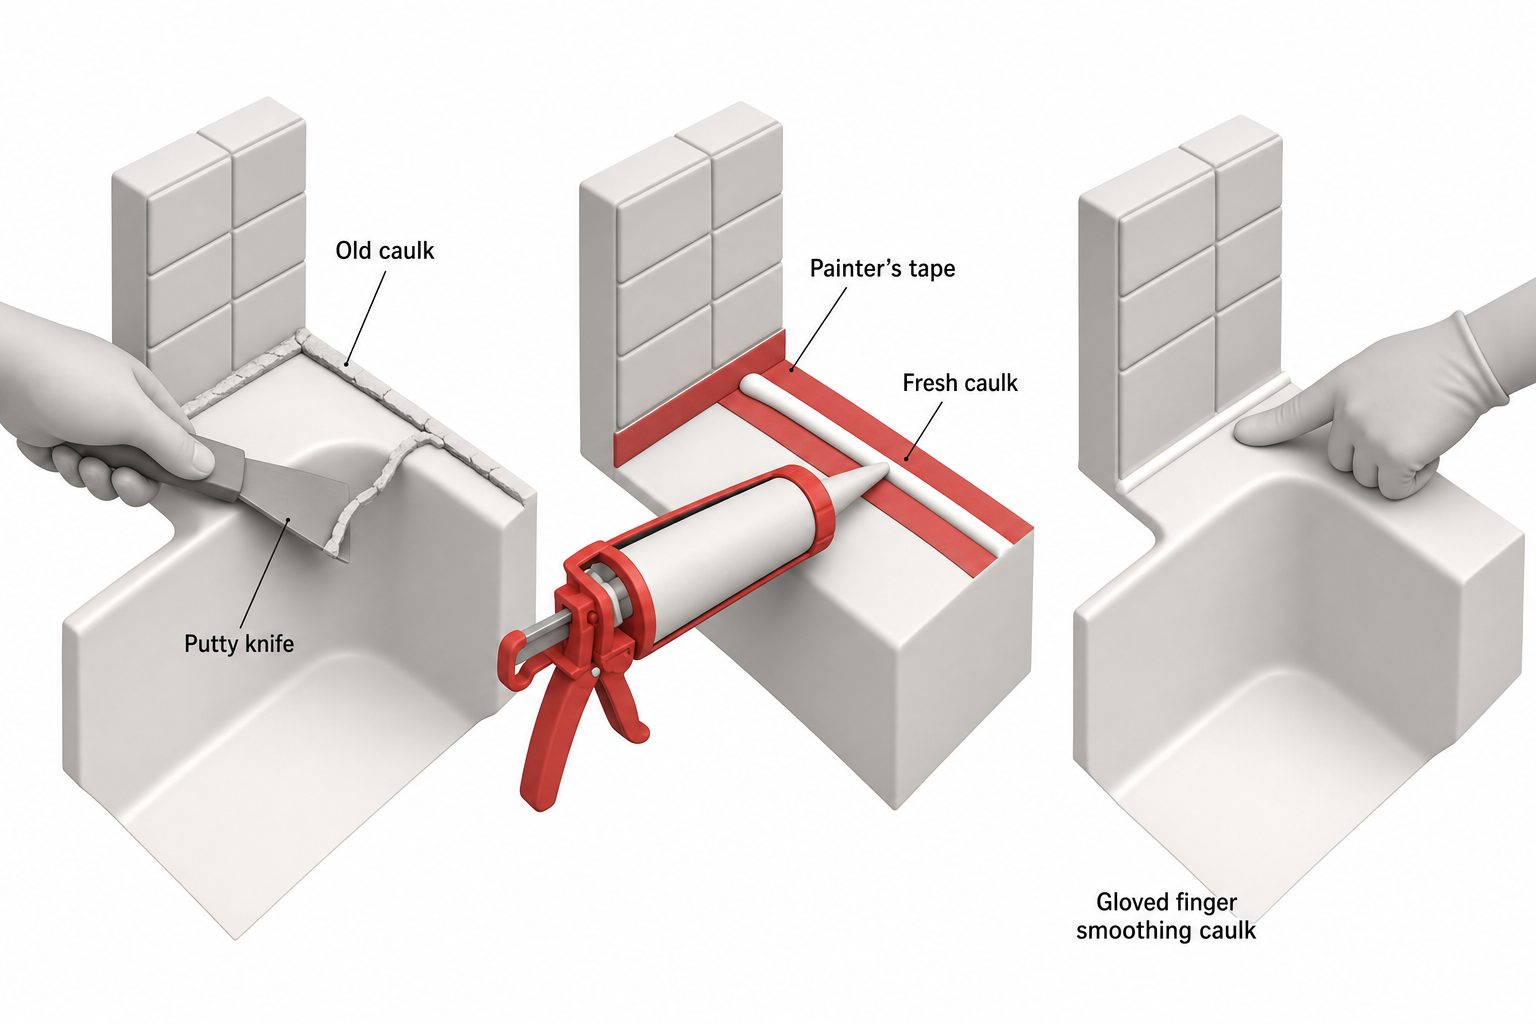
- Cut and pull the old caulk. Score along both edges of the caulk bead with a utility knife, then peel it out with a caulk removal tool or the flat edge of a putty knife. Work slowly to avoid gouging the tub, tile, or fiberglass surface.
- Clean the channel completely. Any leftover caulk residue or mold film will undermine the new bead. Scrub the gap with an old toothbrush and rubbing alcohol, then let it dry fully — ideally run the exhaust fan for 1in — actually, give it at least an hour, and confirm the surface is bone dry before moving on. Trapped moisture behind new caulk is the single most common reason re-caulking jobs fail early.
- Tape both edges. Run painter's tape along the tub/tile and the wall/tile lines, leaving the gap exposed. This gives you clean, straight lines and makes cleanup easier.
- Cut the tube tip at roughly a 45-degree angle, sized to about the width of the gap you're filling — for a typical 0.25in gap, cut a small opening.
- Run a continuous bead down the length of the seam in one smooth pass, keeping steady pressure on the gun.
- Tool the bead immediately with a wet, gloved fingertip or a caulk finishing tool, drawing it once along the length to press the caulk into the gap and create a smooth concave surface.
- Pull the tape immediately, before the caulk skins over, for the cleanest edge.
- Let it cure fully before getting it wet — check the product's label, but plan on avoiding water contact for at least 24 hours, and full cure can take several days depending on the product and humidity.
[!region] Some local plumbing or building codes and manufacturer warranties specify particular sealant types for wet areas around tubs and showers (for example, 100% silicone versus siliconized acrylic). Check your area's requirements and any fixture warranty terms before choosing a caulk product.
Preventing Mold From Coming Back
- Run the bathroom exhaust fan during and for 20in — actually, run it for about 20 to 30 minutes after every shower to clear humidity.
- Squeegee the tub and shower walls after use; less standing water means less food and moisture for mold.
- Leave the shower curtain or door slightly open so the caulk area can air-dry rather than staying damp.
- Wipe down the caulk line weekly with a bathroom cleaner or diluted vinegar as routine maintenance rather than waiting for visible mold.
- Consider a small dehumidifier in bathrooms without good ventilation, particularly in humid climates.
[!safety] If you discover extensive mold behind the caulk, on drywall, or around the tub that suggests a hidden leak, stop and investigate the source before re-caulking — sealing over an active leak will trap moisture and cause more serious mold and structural damage. Significant hidden mold or suspected water damage in walls or subfloor is a job for a licensed mold remediation or plumbing professional.
FAQ
Can I just use bleach every time mold appears instead of re-caulking? You can, but if mold returns within a couple of weeks in the same spot repeatedly, the mold has likely colonized inside the caulk and bleach is only treating the surface. At that point re-caulking is the more permanent and less time-consuming long-term fix.
Is black caulk mold dangerous to my health? Common bathroom molds are generally considered a respiratory irritant rather than an acute health hazard for most people, but sensitivities vary and some individuals — especially those with asthma, allergies, or compromised immune systems — can react more strongly. When in doubt, treat it and ventilate well, and consult a healthcare provider if you have ongoing symptoms.
How long does mold-resistant caulk actually resist mold? Mold-resistant additives in caulk reduce how hospitable the surface is to mold growth, but no caulk is permanently immune, especially in a consistently damp, poorly ventilated bathroom. Good ventilation and regular cleaning matter as much as the product itself.
Should I use silicone or latex caulk for a shower or tub? Pure silicone caulk generally offers better water resistance and flexibility for wet areas like tub and shower seams, while siliconized latex is easier to apply and paint but can be less durable in constant moisture. Check the product label for a "kitchen & bath" rating and any manufacturer guidance for your specific tub or shower material.
Can I re-caulk over old caulk instead of removing it? It's possible but not recommended — new caulk won't bond well to old caulk or to any mold film left behind, and it will likely fail and trap moisture underneath, making the mold problem worse over time.